
Daml SDK and Canton
This tutorial shows how to run an application on a distributed setup using Canton instead of running it on the Daml sandbox. This comes with a few known problems and this section explains how to work around them.
In this tutorial, you will learn how to run the Create Daml App example on Canton. This guide will teach you:
- The main concepts of Daml
- How to compile your own Daml Archive (DAR)
- How to run the Create Daml App example on Canton
- How to write your own Daml code
- How to integrate a conventional application with Canton
If you haven’t yet done so, please run through the “Getting Started with Canton” and the original Daml getting started guide to familiarise yourself with the example application. Then come back here to get the same example running on Canton.
Starting Canton
Follow the Daml SDK installation guide to get the SDK locally installed.
This guide has been tested with the SDK version 2.5.1. Set the environment variable DAML_SDK_VERSION to 2.5.1 so that
subsequent daml commands use this version.
export DAML_SDK_VERSION=2.5.1
Starting from the location where you unpacked the Canton distribution, fetch the create-daml-app example into a directory
named create-daml-app (as the example configuration files of examples/04-create-daml-app expect the files to be there):
daml new create-daml-app --template create-daml-app
Next, compile the Daml code into a DAR file (this will create the file .daml/dist/create-daml-app-0.1.0.dar), and
run the code generation step used by the UI:
cd create-daml-app
daml build
daml codegen js .daml/dist/create-daml-app-0.1.0.dar -o ui/daml.js
You will also need to install the dependencies for the UI:
cd ui
npm install
Next, the original tutorial would ask you to start the Sandbox and the HTTP JSON API with daml start.
We will instead start Canton using the distributed setup
in examples/04-create-daml-app, and will later start the HTTP JSON API in a separate step.
Return to the directory where you unpacked the Canton distribution and start Canton with:
cd ../..
bin/canton -c examples/04-create-daml-app/canton.conf --bootstrap examples/04-create-daml-app/init.canton
Note
If you get an Compilation Failed error, you may have to make the Canton binary executable with chmod +x bin/canton
This will start two participant nodes, allocate the parties Alice, Bob and Public and create
corresponding users alice and bob. Each participant node will expose its own ledger API:
- Alice will be hosted by participant1, with its ledger API on port
12011 - Bob will be hosted by participant2, with its ledger API on port
12021
Note that the examples/04-create-daml-app/init.canton script performs a few setup steps to permission the parties and upload the DAR.
Leave Canton running and switch to a new terminal window.
Running the Create Daml App Example
Once Canton is running, start the HTTP JSON API:
- Connected to the ledger api on port
12011(corresponding to Alice’s participant) - And connected to the UI on the default expected port
7575
DAML_SDK_VERSION=2.5.1 daml json-api \
    --ledger-host localhost \
    --ledger-port 12011 \
    --http-port 7575 \
    --allow-insecure-tokens
Leave this running. The UI can then be started from a third terminal window with:
cd create-daml-app/ui
REACT_APP_LEDGER_ID=participant1 npm start
Note that we have to configure the ledger ID used by the UI to match the name of the participant that we’re running against.
This is done using the environment variable REACT_APP_LEDGER_ID.
We can now log in as alice.
Connecting to participant2
You can log in as Bob using participant2 by following essentially the same process as for participant1, adjusting the ports to
correspond to participant2.
First, start another instance of the HTTP JSON API, this time using the options -- ledger-port=12021 and --http-port 7576.
12021 corresponds to participant2’s ledger port, and 7576 is a new port for another instance of the HTTP JSON API:
DAML_SDK_VERSION=2.5.1 daml json-api \
   --ledger-host localhost \
   --ledger-port 12021 \
   --http-port 7576 \
   --allow-insecure-tokens
Then start another instance of the UI for Bob,
running on port 3001 and connected to the HTTP JSON API on port 7576:
cd create-daml-app/ui
PORT=3001 REACT_APP_HTTP_JSON=http://localhost:7576 REACT_APP_LEDGER_ID=participant2 npm start
You can then log in with the user id bob.
Now that both parties have logged in, you can select Bob in the
dropdown from Alice’s view and follow him and the other way around.
After both parties have followed each other, the resulting view from Alice’s side will look as follows.
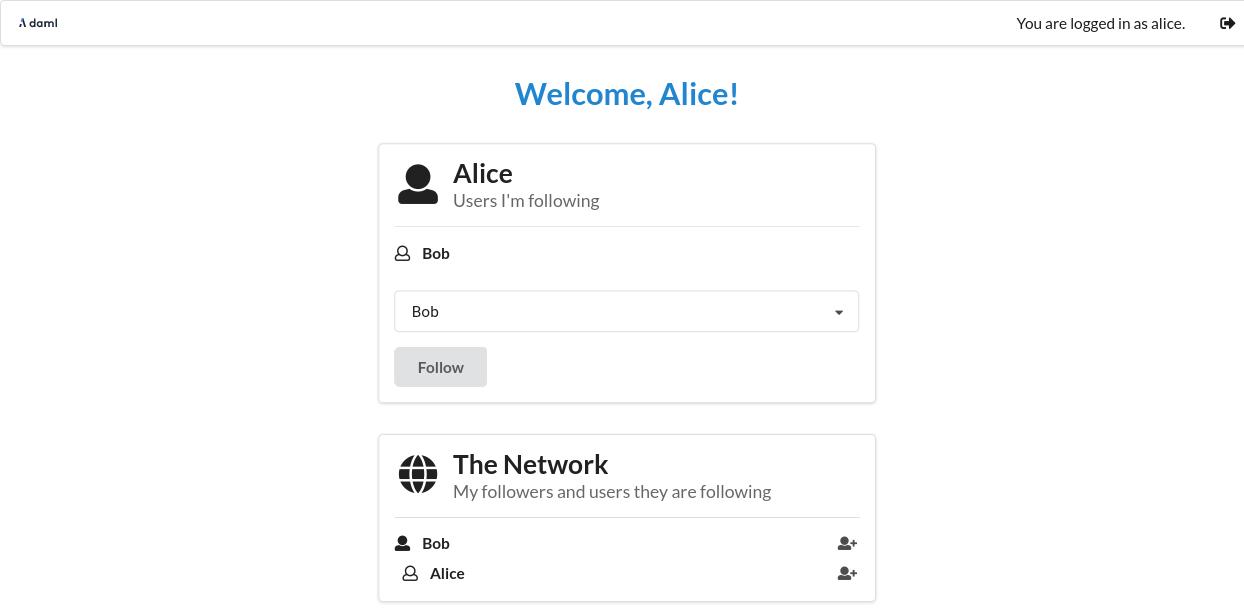
Note that create-daml-app sets up human-readable aliases for party ids, which is why we can use those names to follow other parties instead of their party id.
What Next?
Now that you have started to become familiar with Daml and what a full Daml-based solution looks like, you can build your own first Daml application.
- Use the Daml language reference docs to master Daml and build your own Daml model.
- Test your model using Daml scripts.
- Create a simple UI following the example of the Create Daml App template used in this tutorial.
- See how to compose workflows across multiple Canton sync domains.
- Showcase your application on the forum.